Summary
Part 1
Teaser
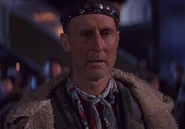
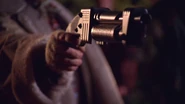
April 5, 2063 – From beyond Earth's atmosphere, a Vulcan ship descends and lands in Bozeman, Montana. Watched by a crowd of onlookers, a member of the Vulcan crew disembarks and approaches Zefram Cochrane. The alien performs a Vulcan salute and recites a Vulcan salutation: "Live long and prosper." Cochrane tries to imitate the newcomer's salute. After an unsuccessful attempt, he lowers his hand and, instead of holding it for a handshake (which is what happened in a similar parallel universe), he reaches into his coat and pulls out a shotgun with which he shoots the Vulcan, who instantly collapses. A bearded man in the crowd tells the other Human spectators to board the alien ship and take everything they can. Then the crowd storms the Vulcan craft, carrying shotguns as they run.
Act One
Aboard the ISS Enterprise, Reed and Dr. Phlox demonstrate their new invention of an agony booth to Captain Maximilian Forrest and First Officer Jonathan Archer, using the booth on a Tellarite officer named Terev. The observers discuss attributes of certain torture methods. Although Reed is unsure why Terev is being punished, the Major believes all Tellarites are guilty of something. Captain Forrest exits, followed out by Archer.
In a corridor, Archer reminds the captain of a proposal he made to venture into Tholian space, as Archer has received news of a technology there that would give the Terran Empire the upper hand against a rebellion. However, Forrest wants to help the Empire's assault fleet annihilate the rebels, as ordered by Starfleet. Although Forrest suspects that Archer wants to use the technology to attain personal glory, the first officer repudiates this. Archer's insistence on his plan influences Forrest to threaten the first officer with a place in the agony booth. Archer finally yields to Forrest's authority.
Forrest is later busily reviewing work in his quarters when Hoshi Sato approaches, eager to relax him. They kiss passionately, Forrest conceding to her advances. Hoshi remarks that she is likely the only person aboard who doesn't want to kill him. Relaying rumor that a recent battle at Tau Ceti went well, Hoshi plans that – once the war is over – she will return to teaching students in Brazil while Forrest will accept a desk job at Starfleet Headquarters. He, however, explains that the battle was much worse than she has heard; Forrest implies that he is hiding the truth from the rest of the crew. Hoshi advises him to forget about the war and goes back to passionately kissing him.
As Enterprise warps through space, Forrest is making his way through the ship, closely followed by a MACO, when they are ambushed by Archer and MACOs allied with him, including Major Reed and Sergeant Travis Mayweather. Despite Archer ordering Reed to lock Forrest in the brig, the Major is intent on killing the imprisoned captain. Archer threateningly insists that Forrest be kept alive so Reed ultimately relents.
T'Pol is in the bridge's command chair when Archer and his MACOs arrive. Archer seizes control of the bridge and – via a ship-wide communication that is heard by Hoshi Sato, Dr. Phlox and disfigured Chief Engineer Charles Tucker – he assumes command of the rest of the ship, claiming that Starfleet ordered not only his takeover but also that he direct the ship on a vital, secretive mission into Tholian space. Following the message, Archer tells a suspicious T'Pol that his orders were privately sent to him. He oversees the ship's change of course and orders T'Pol to help with the installation of a stored Suliban cloaking device, as it will be necessary to the mission.
In the captain's ready room, T'Pol reluctantly accepts that Archer is in command. He shows her Zefram Cochrane's shotgun, wondering what might have happened if Cochrane had not used it to kill the first Vulcan who set foot on Earth. Reminding T'Pol that she is also Vulcan, Archer asserts his authority. She lets him know that they have likely already entered Tholian-occupied space. Archer assigns her to search for a particular warp signature and, just as she is about to leave, he calls her back in with news that he is promoting her to first officer, explaining why he prefers to assign her to that position rather than Reed. Finally dismissed by Archer, T'Pol exits. He meanwhile returns Cochrane's gun to its display.
Later, Archer personally promotes Sergeant Mayweather to acting as the Captain's personal guard. Mayweather starts to congratulate Archer on his successful mutiny but the newly appointed captain cuts him short, followed by snarls from a hungry Porthos. Hoshi arrives and Archer dismisses Mayweather. Hoshi admits that she knows Archer didn't receive orders from Starfleet. He shows a curious Hoshi that Forrest is still alive and says the former captain will remain that way as long as Hoshi cooperates. Although she seduces Archer into accepting her continuance as the Captain's woman, she pulls a knife out while they kiss. He disarms her as T'Pol hails him. The Vulcan reports that Enterprise is approaching the sought-after warp signature and Archer warns Hoshi to be "in a better mood" upon his return.
Enterprise drops out of warp, nearing its target: a Tholian starship, manned by a single Tholian. Following a failed plan to tractor onto the enemy craft and a subsequent brief exchange of firepower, Enterprise disables the Tholian ship. Its pilot starts an overload in its reactor but is beamed into Enterprise's Decon chamber just as its own ship explodes. Acting on orders from Archer, Dr. Phlox delightedly begins to torture the Tholian by modifying the chamber's atmosphere.
Act Two
The senior staff gather outside the Decon chamber. Archer is initially startled by the Tholian suddenly appearing. He is interested to know where the Tholians have taken a Terran vessel they captured. Phlox tortures the prisoner until it admits that Archer's quarry is at an orbital facility in the Vintaak system. The Tholian then starts using its own crystalline structure to transmit a distress signal. Archer lets his senior officers know that he would prefer to keep the alien alive but unconscious until its information is confirmed.
Working with T'Pol on installing the cloak in Engineering, Tucker sees to it that she has a radiation meter, as it will prevent her from absorbing the same kind of delta rays that disfigured him. Discussion turns, much to T'Pol's discomfort, to a past experience wherein Tucker allowed her to relieve pon farr with him. An electrical overload sparking to the cloaking device electrocutes Tucker.
Archer and Reed later inquire into the incident. The captain is insistent that Tucker prioritize the cloak's repair. Reed is suspicious of the overload, while a secretly knowledgeable T'Pol watches, but Tucker objects to Reed's MACOs investigating.
In the brig, Archer demands that Forrest identify the saboteur, believing it was a spy assigned by Admiral Black, but Forrest claims ignorance. Archer orders Mayweather, on brig duty, to search the captain's quarters for telltale messages from Starfleet. Mayweather complies, ignoring a cautioning of execution from Forrest. Now alone with Archer, Forrest criticizes him of having always lacked ambition. Archer brutalizes Forrest, citing his imprisonment as a sign that he is incorrect. Forrest pleads for Archer to release him, claiming consequences of both freeing him and killing him. Archer throws him against a bulkhead and departs.
In the bridge's situation room, Reed explains to Archer that evidence points to Tucker as being the saboteur.
Tucker is later punished in the agony booth. He claims he is innocent and threatens Reed for having implicated him but Reed merely teases Tucker in return. Archer suspects Tucker is Admiral Black's spy and, despite Tucker insisting to the contrary, a distrusting Archer directs Reed to continue subjecting Tucker to the agony booth.
Later in the captain's quarters, Archer and Hoshi lie together, clearly having had sexual intercourse. The captain ensures that Hoshi transmitted data to the fleet admiral but only refers to it cryptically, as an "insurance policy." Archer then starts to suspect T'Pol of being the saboteur, finding that she cannot be located by the ship's computer as the overload damaged the internal sensors.
T'Pol meanwhile leads a successful rescue effort to free Forrest from the brig, two Vulcan companions of hers having a brief encounter with Archer, who escapes in a turbolift. Forrest and T'Pol then retake command from the bridge but find that the ship is locked on course, which Archer personally confirms before sarcastically relinquishing command to Forrest.
Act Three
With Archer having spent ten hours in the agony booth, Phlox remarks to Captain Forrest that he is amazed by Archer's pain threshold but the captain is reluctantly forced to release Archer from the booth. Forrest not only wishes to instead use it on Major Reed but also privately informs Archer that Fleet Admiral Gardner has ordered his release, having been intrigued by the data Archer sent via Hoshi; the captain implies that the data pertained to Archer's plan to search for the captured Terran vessel. A seething Forrest lets Archer know that his betrayal is unforgivable and notifies Archer that he is due to brief the senior staff in an hour.
While Enterprise continues at warp speed, the senior staff are gathered in the briefing room. T'Pol cites the findings of the Vulcan Science Directorate as proof that alternate realities do not exist but Archer says Tholians are more open-minded than Vulcans. He continues briefing the senior staff, explaining that – after managing to open an interphasic rift into a parallel universe – the Tholians intentionally lured a ship through from the other side. Archer also reveals that he bought his information from a Humanoid laborer working for the Tholians and shows the other officers some images of the captured ship. The assembled crew members muse over the significance of the craft, which Archer says is not only from another universe but also from about a hundred years into the future. T'Pol strongly objects to the information, fearing it is a trap and reminding Forrest of Archer's crimes, but Forrest insultingly interrupts her – adamant that they will investigate the ship – and instructs Tucker to get the cloak working before he exits.
While working on the cloak in Engineering, Tucker becomes distracted by T'Pol's presence and vents his anger at her for having apparently falsified the evidence that incriminated him earlier. She explains that she seduced him away from Engineering before motivating him, by way of a Vulcan mind meld, to sabotage the cloak himself before using another meld to alter his memory of what had happened. She states that she was duty-bound to help Forrest regain command. Tucker warns that she will regret her actions, although T'Pol dismisses his threat. He calls the bridge and reports that the cloak is ready, so Forrest orders for it to be engaged. The ship at first encounters slight energy fluctuations but then cloaks.
Soon thereafter, T'Pol is at the bridge's science station when Enterprise reaches its destination, in proximity of a gas giant in the Vintaak system. The bridge officers spot the captured ship in a drydock built into a moon of the gas giant. The vessel is the Constitution-class Federation starship USS Defiant.
Act Four
T'Pol briefs Archer, Tucker, Reed and Forrest in the situation room, telling them that Defiant's systems, even that of life support, are powered down. Those alive aboard the Defiant consist of thirteen non-Humans, including one reptilian. Although Tucker is impressed by the vessel's engineering capabilities, Forrest plans for Archer to lead an assault team to salvage as much as possible from the craft's databanks before destroying the ship, as the captain fears that the region of space is too dangerous. Archer objects to this plan but Forrest shouts him down. Moments after the others leave, Forrest instructs T'Pol to join the assault team, conspiratorially implying that he wants her to ensure Archer dies during the mission.
Wearing environmental suits, the team (now including Sergeant Mayweather) beam into a corridor of the Defiant to find that the Tholians have been gutting the vessel. The team also come across a dead Human security officer lying beside a discarded phaser. Reed offers to hold the weapon but Archer takes it instead.
On Enterprise, a sedative that Phlox has been using on the Tholian pilot stops working and the alien begins retransmitting its bodily distress signal. After the signal is detected on the bridge, Forrest contacts Phlox, ordering him to kill the Tholian. Doing so takes time and Phlox becomes impatiently frustrated. He eventually succeeds in destroying the Tholian but its communication has attracted the attention of three Tholian vessels that approach Enterprise and start to hail the ship.
The assault team meanwhile arrive on the Defiant's darkened bridge. They find only two deceased officers there, one of whom is a man wearing a command division uniform; Archer assumes he is the captain and T'Pol reports he has a broken neck. With Archer's approval, Tucker begins attempting to repower the vessel.
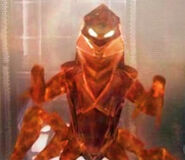
The Tholians create a gigantic web to ensnare Enterprise
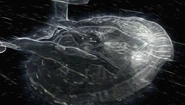
Four more Tholian ships approach Enterprise and, despite an initial attempt by Forrest to withdraw from the mission, the alien vessels are not only jamming communications between the pair of Starfleet ships but also subsequently create an energy web that surrounds Enterprise. Forrest first tries to fire the the ship's weaponry through the web and then maneuver out of it but neither method succeeds; Enterprise is trapped.
Archer and an assault team on the Defiant bridge
Tucker's eventual restoration of power to the Defiant's systems enables T'Pol to monitor Enterprise's situation.
Moments later, Forrest orders the crew to abandon ship but, much to Hoshi's concern, he chooses to stay behind in the hope that he might be able to buy the survivors more time.
Archer orders that the Defiant's weapons and engine systems are brought back on-line and, with the help of Mayweather and Reed, he starts to remove the two dead officers from their positions in front of the command chair.
Archer watches as Enterprise explodes
Enterprise meanwhile launches its complement of escape pods but many are instantly destroyed. Forrest holds on to the helm station of his dying ship, moments before the assault team watch Enterprise explode.
Part 2
Teaser
On the bridge of the USS Defiant – having just witnessed the destruction of the ISS Enterprise by the Tholians – Commander Archer supervises Chief Engineer Tucker, T'Pol, and Major Reed, as the team desperately try to escape from a Tholian drydock that holds the Defiant. Even though they manage to shake the starship free from the facility's docking clamps, six Tholian ships approach and speedily construct an energy net over the opening of the dock, effectively barring the Defiant's escape.
Act One
With T'Pol's assistance, Tucker manages to restore power to the Defiant's weapon systems. The ship then blasts its way out of the dock, destroying half of the Tholian ships in the process and continues maneuvering away, firing photon torpedoes at the Tholian facility while departing. Reed detects escape pods from Enterprise, so Archer orders that they be brought aboard.
As the Defiant continues on impulse power, Archer confers with his officers, including Doctor Phlox and Hoshi Sato, in the ship's briefing room. He demands that Tucker carry out the difficult task of restoring the advanced ship's warp drive, and T'Pol suggests using the expertise of the alien slave workers aboard to do so. Archer implies an agreement with T'Pol's recommendation. Although he plans that the ship will rendezvous with the Terran Empire's assault fleet, T'Pol argues that they are unprepared for battle. Archer insists on his plan and dismisses the other officers, but ensures T'Pol stays behind. He is furious that she betrayed him while aboard Enterprise. Now that Captain Forrest is dead and T'Pol finds herself threatened by Archer, she pledges allegiance to Archer, who claims the only reason she is still alive is that he needs her to help run the Defiant. Finally, he angrily dismisses her.
Hoshi Sato later arrives at the captain's quarters and is amused to find Archer proudly adorned in the dress uniform of the Defiant's former captain. After discussing the uniform, Archer tells Sato about the parallel universe that the Defiant is from, having reviewed the ship's databanks. While she pours him a drink, he says that the other universe has no Terran Empire but that Earth instead joined the United Federation of Planets. Archer and Sato humiliate one another by showing each other the service record of the other's counterpart, Sato finding that Archer's duplicate was a highly successful Starfleet officer. Archer finds difficulty with accepting that his own counterpart was instrumental in the Federation's founding. Sato tries to distract Archer with thoughts of his own promising future but, when she mentions that Starfleet will have to give him a command of his own, Archer declares he already has that.
At a vertical Jefferies tube, Tucker is irritated by Ensign Kelby reporting that a pair of plasma regulators have recently gone missing from the tube's interior. Tucker threatens Kelby to find the regulators, or be made responsible for the Defiant's inability to go to warp. After Tucker hurries away, Kelby climbs into an access tunnel above, hearing strange rattling. He finds one of the regulators lying on the floor but is pulled headfirst into a Jefferies tube directly above him.
Archer orders his crew to find the saboteur
On the bridge, Phlox reports to Archer that evidence regarding Kelby's death indicates the killer was a large reptilian. T'Pol, Reed, and Phlox discuss the reptilian. Tucker arrives and irritably comments that, without the plasma regulators, the ship is stuck at impulse, indicating – as T'Pol deduces – that the saboteur was well-acquainted with the ship's systems. Reed enthusiastically approves with Archer ordering him to bring one of the alien slaves to the briefing room.
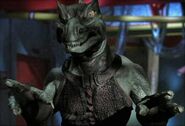
There, Archer brutally interrogates a blue-skinned alien, who fears the reptilian will kill him and is therefore initially tight-lipped. Archer pressures the slave into eventually divulging information about the reptilian saboteur – a slave-master named Slar who was responsible for gutting the ship and whose species is Gorn.
Act Two
On the bridge, Reed shows Archer a schematic of the Defiant and updates him on the search for Slar, who recently escaped from Reed's MACOs. Archer sees an hallucination of his counterpart from the Federation universe, who criticizes the lengthy search effort and boasts about how he handled a similar situation. A frustrated Archer directs Reed to form an assault team that Archer himself will lead. From the communications station, Sato detects Slar but cannot pinpoint his location. Archer contacts the Gorn but is unwilling to negotiate the return of the plasma regulators in exchange for allowing Slar to leave in a shuttlecraft. Eventually, Slar abruptly ends the transmission. Archer reminds Reed to form the assault team and explains to T'Pol, as he heads off the bridge, that he is skeptical of the Gorn's sincerity.
Inside a turbolift, Archer's hallucinatory double reappears, whispering to him that defeating Slar will finally earn Archer the respect he deserves.
Archer later leads the assault team – including Reed and four MACOs – through the ship, first heading up a vertical Jefferies tube and into an access tunnel. Reed and three of the MACOs fall victim to a trap, however, and are downed by a remotely triggered explosion. Contacting T'Pol on the bridge, Archer learns of the Gorn's whereabouts and tells her to standby with that deck's environmental controls.
He and the remaining MACO near the Gorn's location, silently searching a corridor that is strewn both with exposed internals of the ship and with the bodies of several deceased officers. Without noticing Slar, Archer passes directly beneath the Gorn. He gives the MACO an all-clear signal, moments before Slar plummets down on Archer, causing him to drop his phaser. As he and the MACO assault the Gorn, it scratches Archer's torso before turning its ferocious attention on the MACO, who Slar picks up and slams into a bulkhead. The Gorn approaches Archer as he quickly contacts T'Pol, instructing her to lower a certain section of the gravity plating. Her doing so drags the Gorn to the deck. Joined by two MACOs from a nearby turbolift, Archer repeatedly shoots the Gorn 6 times, killing Slar.
As the Defiant proceeds at warp, T'Pol and Phlox sit together in the officer's lounge. Phlox reveals to a curious T'Pol that Reed could just as likely die as survive and that he himself has been researching classical literature of both universes. With the exception of the consistently grim playwright Shakespeare, Phlox has a lowly opinion of the other universe's stories. T'Pol begins to speak of the Federation's equality but Phlox fears the danger that the crew could learn such discoveries. Their conversation is interrupted by a call to battle stations.
Meanwhile, the NX-class starship ISS Avenger rushes out of a debris field, under attack by four rebel vessels in pursuit. The Avenger is fighting a losing battle, with Admiral Black assuming command from a dead captain. However, the Defiant soon arrives and speedily dispatches three of the rebel ships, despite T'Pol trying to dissuade Archer from destroying a Vulcan craft. He leaves an Andorian ship to warn the other rebels of the mass destruction and then contacts Admiral Black, who is puzzled by the absence of Enterprise. Archer says the situation will take time to explain and invites the admiral aboard the Defiant.
Returning from a tour of the ship, Archer and an impressed Black later enter the briefing room, accompanied by Sergeant Mayweather, the Avenger's Vulcan second-in-command (Soval) and a guard of the admiral's. As the admiral refuses to grant Archer a battlefield commission to captain of the Defiant and Archer is teased by an illusory reappearance of his own duplicate, he insists that he is already a captain and – immediately after Mayweather kicks the admiral's guard to the deck – Archer disintegrates Black with a phaser.
Act Three
With Avenger and the Defiant traveling side-by-side, officers from both ships are gathered in Avenger's launch bay and watch Archer make a dramatic spiel, gradually moving from a walkway above the bay to a kneeling position atop a shuttlepod. He lengthily criticizes Starfleet Command for having allowed the recent annihilation of the assault fleet and rallies the officers to his cause against Starfleet Command, proposing that they utilize the Defiant's advanced capabilities.
Later, T'Pol and Soval have a conspiratorial meeting in the latter Vulcan's quarters. Soval remarks that T'Pol's use of a Vulcan salute, upon her arrival, is socially hazardous. She confirms that he read about the Federation, from the Defiant's historical database. Fearing that Archer will decimate the Vulcan species and their homeworld, T'Pol appeals for Soval to help her betray Archer, suggesting that she acquire the Defiant's schematics before giving them to the rebels. Soval at first argues against her and is alarmed by her announcing that she will destroy the Defiant but he eventually acquiesces to her intentions.
Meanwhile, Archer and then Sato – the captain's woman – sit up from the bed of the captain's quarters, which are now darkened. Archer worries that his senior officers, particularly T'Pol, doubt that he can succeed. Attempting to reassure him, Sato suggests disposing of T'Pol, now that the Defiant is operational. Archer suddenly reveals he is intending to transfer all the non-Humans off the ship but Sato reminds him that Phlox is one of those aliens. As the couple begin to passionately caress each other, Archer accepts that Phlox can remain aboard, as his species are not rebels, and Sato wonders what will be required in the role of the Emperor's consort, to which Archer says she seems to have mastered the basics.
On the bridge, T'Pol secretly downloads Defiant's schematics from the science station. After arriving with Mayweather and a MACO, however, Archer not only orders that he be put in contact with Fleet Admiral Gardner, but also directs the MACO to escort T'Pol to a transporter room. Just before she leaves, Archer makes it clear to T'Pol that she is no longer needed nor wanted aboard the ship. Gardner appears on the viewscreen and is furiously astounded that Archer has had the gall to demand Starfleet's "unconditional surrender." Explaining that Admiral Black is currently unavailable, Archer exchanges threats with Gardner over the consequences of whether the Defiant is permitted access to Earth, though the Fleet Admiral is far more serious in his demeanor.
While walking through a corridor of the Defiant, Phlox is signaled with a request for his immediate presence aboard the Avenger, apparently due to an unspecified medical emergency. Soon after arriving there, however, he finds that neither T'Pol nor Soval are injured.
On the walkway above Avenger's launch bay, the Vulcans attempt to convince Phlox to join their mutinous crusade. The doctor is initially astonished that they want him to sabotage the Defiant. Although he continues to dispute their ideas, Phlox starts to become convinced to join them, after the Vulcans tempt him by imagining what the Emperor might grant him in return for saving his life from Archer, such as an unlimited number of concubines. Ultimately, Phlox justifies the Vulcans' plan to himself.
Act Four
T'Pol later hurries through a corridor aboard Avenger but is confronted by Hoshi Sato and a MACO, who have phase weapons poised at the ready. Sato demands to know where the downloaded schematics are, but T'Pol feigns mere confusion. Despite Sato trying to take T'Pol back into custody, the Vulcan repeatedly attacks the MACO and a fight ensues between T'Pol and Sato, the women exchanging cattish insults. T'Pol eventually knocks Sato to the deck, but her attempted escape is thwarted by the MACO, who stuns T'Pol with his own particle rifle. Standing back up, Sato orders the MACO to bring T'Pol with them.
Meanwhile, Phlox sneaks into a Jefferies tube aboard the Defiant and Soval oversees the securing of the Avenger's bridge, an Andorian male and an Orion female manning the helm and tactical stations, respectively.
Having learned of T'Pol's most recent mutiny against him, Archer talks with her in the briefing room, having obtained her copy of downloaded Defiant schematics, while Sato sits nearby. An uncooperative T'Pol contends that an alliance like the Federation is inevitable in their own universe and that Humanity will eventually pay for its arrogance.
Phlox begins his work
Phlox begins to sabotage the Defiant from inside an access tunnel and is, at first, assisted with vocal commands from Soval, who remains on Avenger's bridge. Aboard the Defiant, the sabotage results in a power drain developing, which Tucker decides to personally investigate. Aided by the gradual loss of the Defiant's total power, Avenger launches an incessant offensive against the Defiant, aboard which Tucker finds and battles Phlox. After managing to floor the saboteur, Tucker re-energizes the Defiant, restoring the craft's shields and weapon systems. The Defiant retaliates against Avenger, which Archer purposefully destroys.
Later lying down on their bunk while drenched in sweat, Archer tells Sato to delete the historical database on the following morning. As Sato hands him a glass from the floor and takes one for herself, Archer fears that anyone else might become inspired by the Federation. The couple toast their drinks to his plan before Sato changes the subject of discussion, wondering if he thinks Starfleet's commanders will support him. Archer believes they are consistently loyal to whomever holds the title of Emperor and, upon considering the start of his own reign, he pours a celebratory drink into his throat while holding his glass in the air. He continues to plot his reign but his words become thready and he collapses to the floor, clutching his chest in agony. After rushing to the room's door, Sato opens it for Mayweather, who she passionately kisses while a pained Archer watches, realizing she has betrayed him.
The Defiant orbits Earth as Sato enters the bridge, accompanied by Mayweather and a MACO. At her instruction, Fleet Admiral Gardner appears on the viewscreen. Sato threatens the admiral that the Defiant will attack Earth if Starfleet does not immediately surrender. She identifies herself, to a perplexed Gardner, as "Empress Sato" and advises him to await her commands.
Characters
Regulars
Others
- Black • V. Brown • Zefram Cochrane • Maximilian Forrest • Gardner • Kelby • Porthos • B. Scott • Soval • Slar • Terev
References
Starships
- ISS Enterprise (NX-01) - NX class
- USS Defiant (NCC-1764) - Constitution class
- ISS Avenger (NX-09) - NX class
- T'Plana-Hath - T'Plana-Hath class
- Kumari class
- D'Kyr type
Locations
Species
States and Organisations
Other
Information
Related Stories
Images
Reviews
| published order | ||
|---|---|---|
| Previous episode: Bound |
Enterprise episode produced | Next episode: Demons |
| Previous episode: Bound |
Enterprise episode aired | Next episode: Demons |
| chronological order | ||
| Previous Adventure: Rosetta |
Next Adventure: Demons | |
External link
- In a Mirror, Darkly article at Memory Alpha, the wiki for canon Star Trek.
- In a Mirror, Darkly article at Memory Alpha, the wiki for canon Star Trek.

